

Thanks to Instagram and co, the old school look is making a comeback. The vintage look is currently one of the most frequently used effects in film, whether in music videos or Internet blogs.
Text & Photos: by Lorenz Töpfer
The special thing about the vintage look is the interplay of colours in the images which invokes a pleasant, warm mood in viewers. Examples can be found on YouTube in our Ois-GuadeGroovt TV Channel.
With one simple trick, which we will show you in this tutorial, you can adapt your film to the desired look. All you need is Adobe After Effects and a high performance computer. We will show you some very good techniques which can help you to increase your creativity in the future. Of course you can also take the effect described here and develop some of the details a little further to add a personal touch.
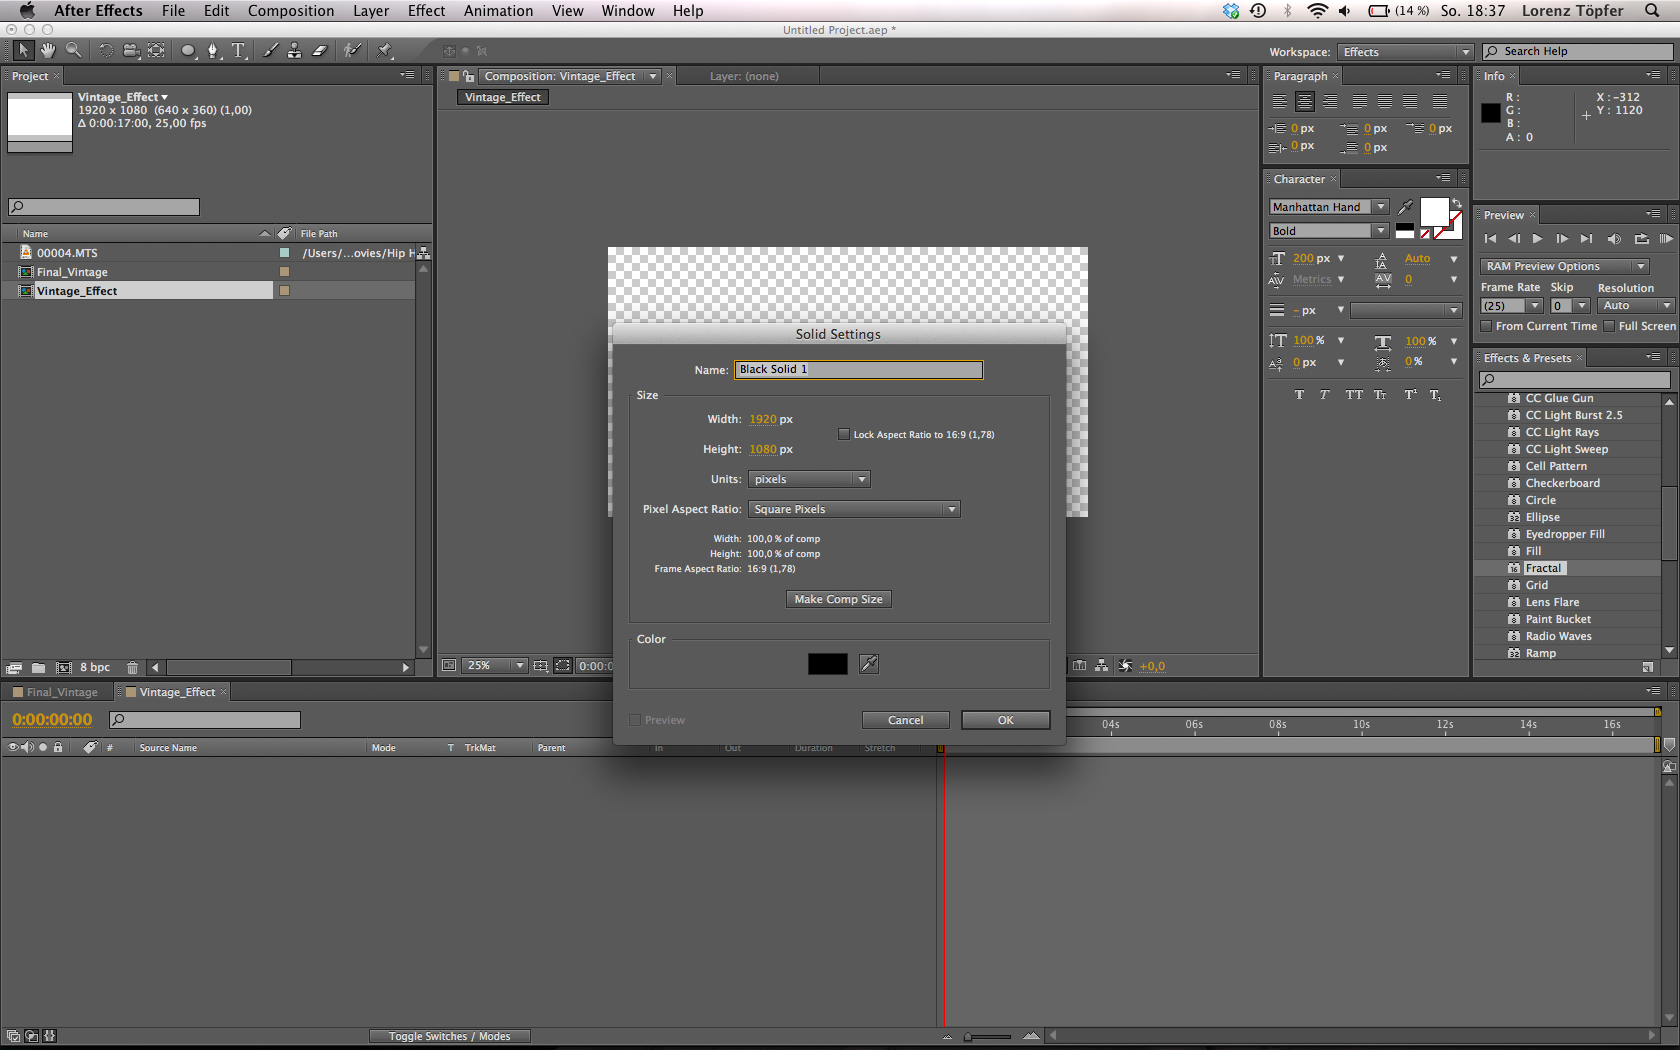 1. After importing the desired film material into Adobe After Effects create two new compositions. Call the first one FINAL_VINTAGE and drag and drop the film material in there. Then insert a Black Solid into the second composition by right clicking in the layer window. Name this composition VINTAGE_EFFECT; it will be worked on first.
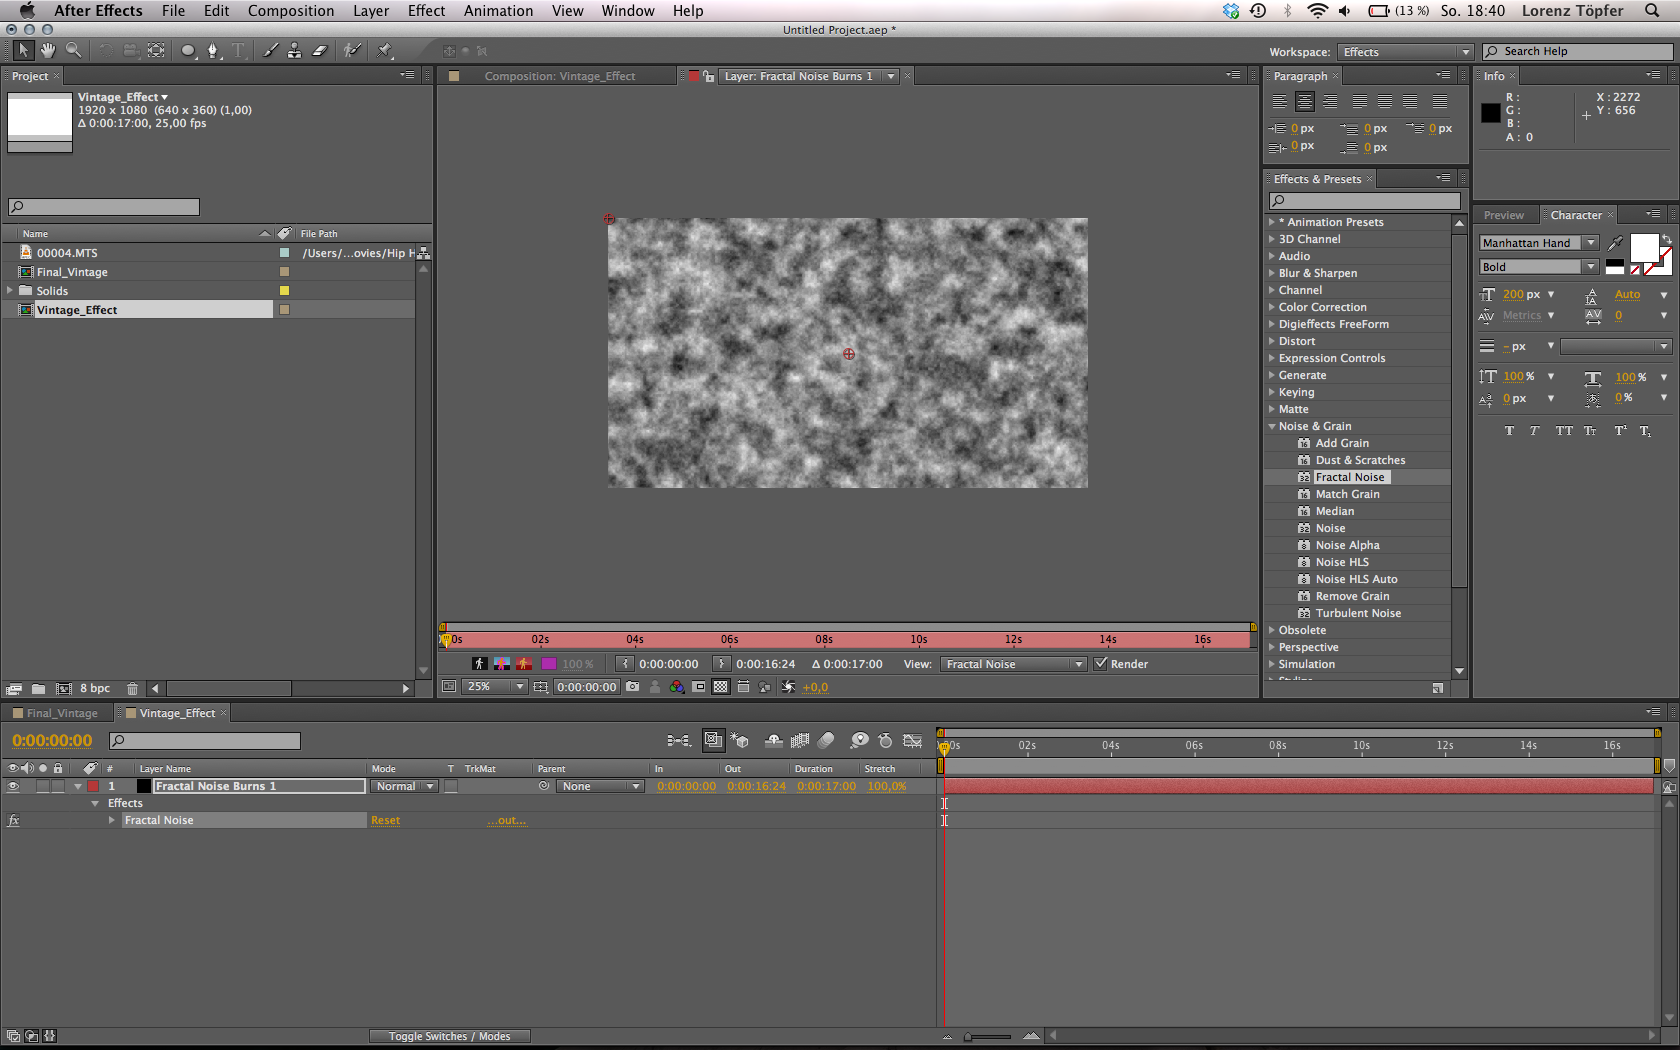 2. Browse the Effects & Presets window and find the effect called Fractal Noise, which can be found in the Noise & Grain folder. Apply this by pressing down the left mouse button on the Black Solid in your composition. Fractal noise normally produces random interference. If the parameters are, how-ever, set up correctly a great effect will occur from the ‘trashy’ image which is just asking to be experi-mented with. Call the layer FRACTAL NOISE BURNS 1, so that later on in the process there is no confusion between the individual layers.
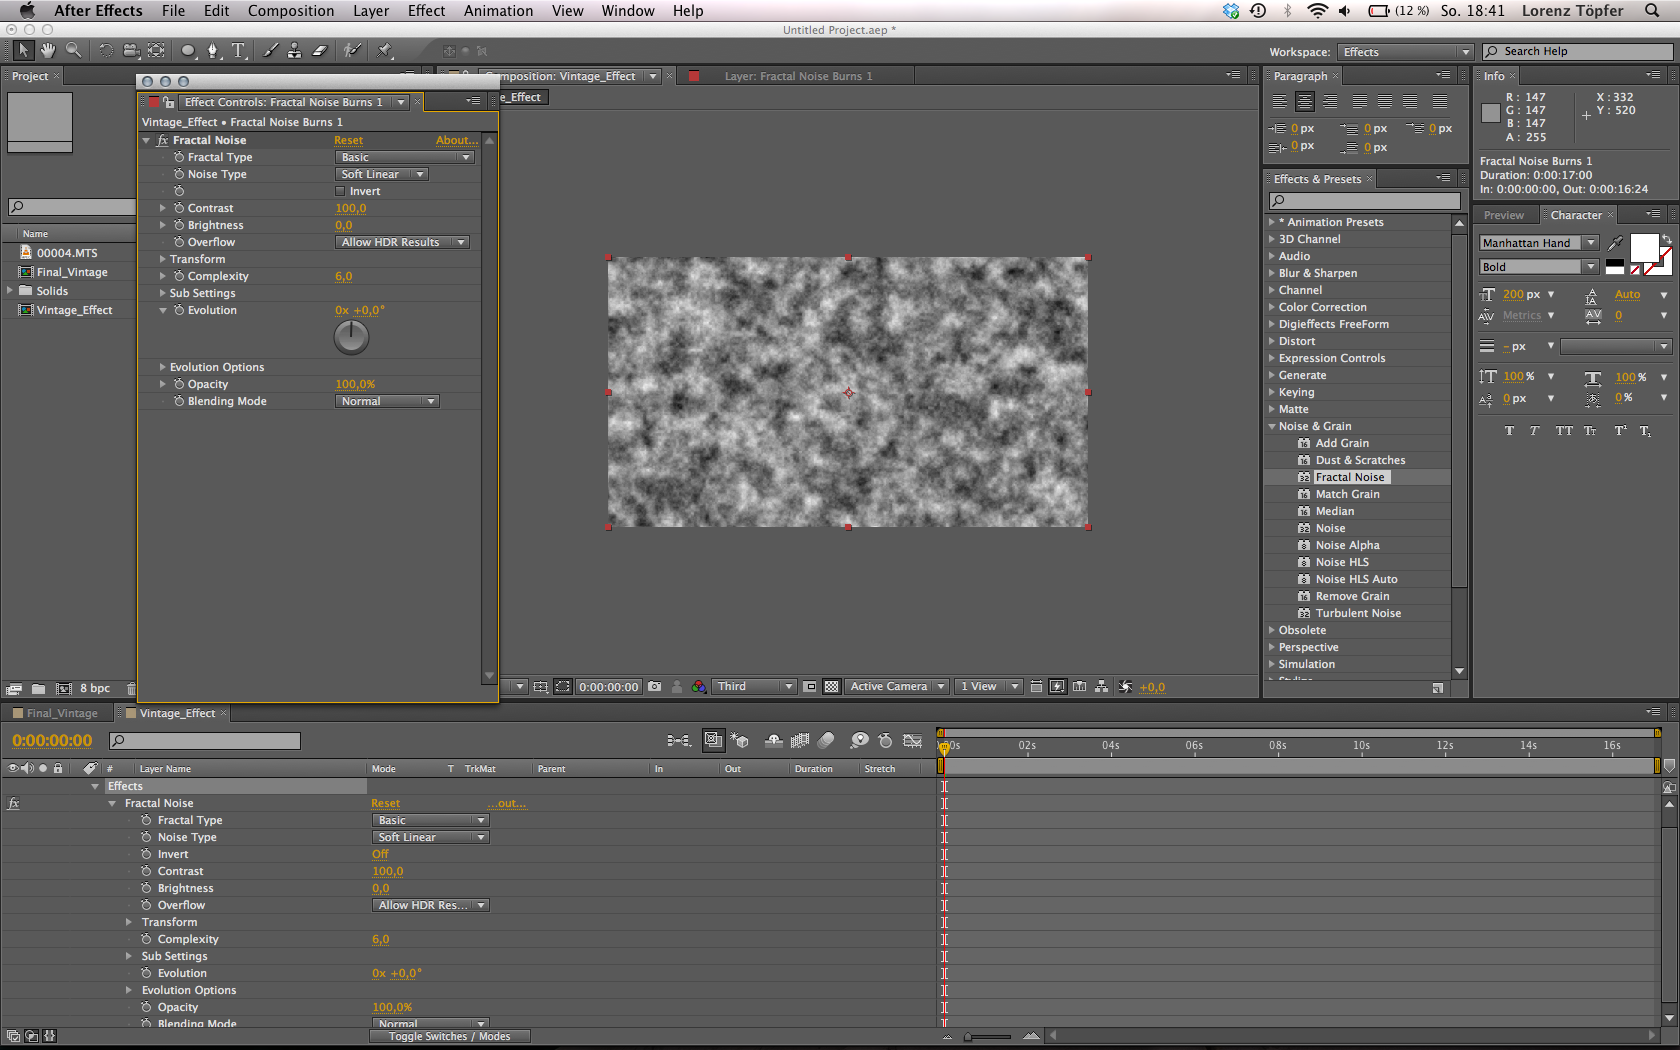 3. In order to achieve a faded film effect, open the Effect Controls. To do so select the layer and press the E key. This shortcut will cause all effects in a level to be displayed in the layer window. We recommend double clicking on the Fractal Noise effect in order to make the user interface clearer. This will open an additional window. In this window the Evolution can be edited using the dial meaning that figures must not be laboriously changed.
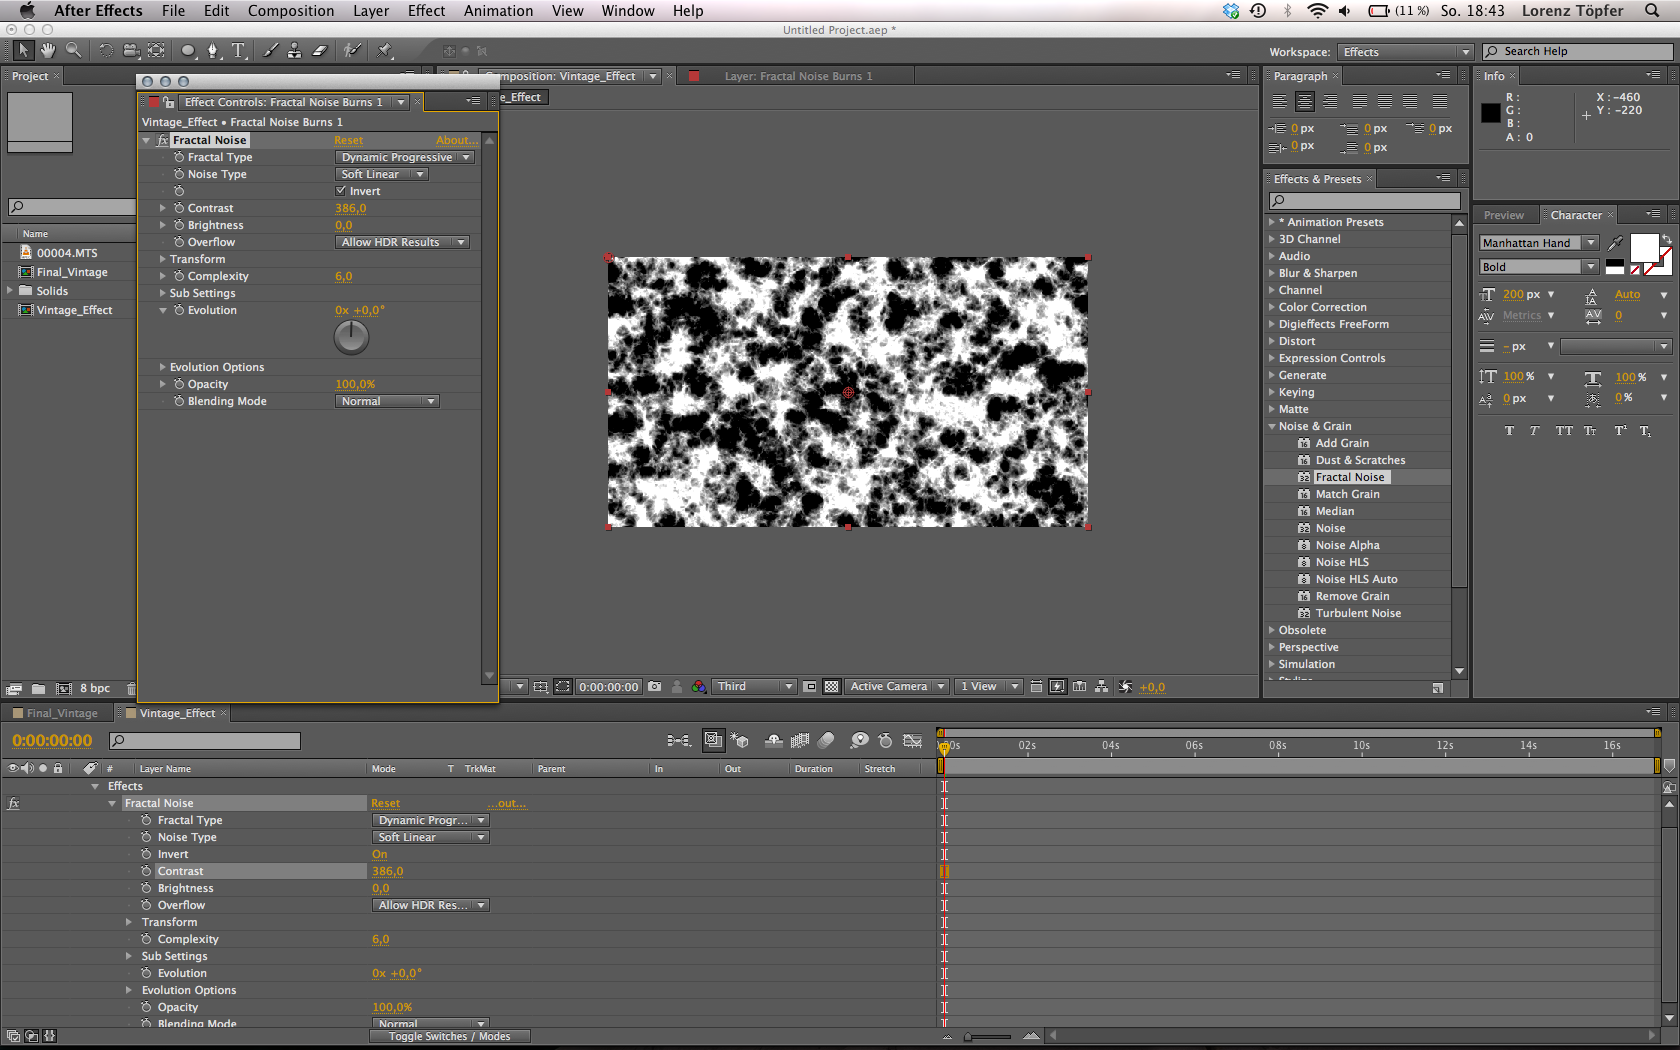 4. Now it is time to change Fractal Noise into a vintage colour gradient using specific settings. First check the Fractal Type setting. In our tutorial we have decided to use Dynamic Progressive in this layer, however, you can use other settings to attain other unique combinations. Select Soft Linear as the Noise Type. In addition tick Invert. Then set the Contrast to a value between 300 and 400 and leave the Brightness at 0. This will mean that the Fractal Noise is no longer so plastic, but rather like a two tone flecked layer.
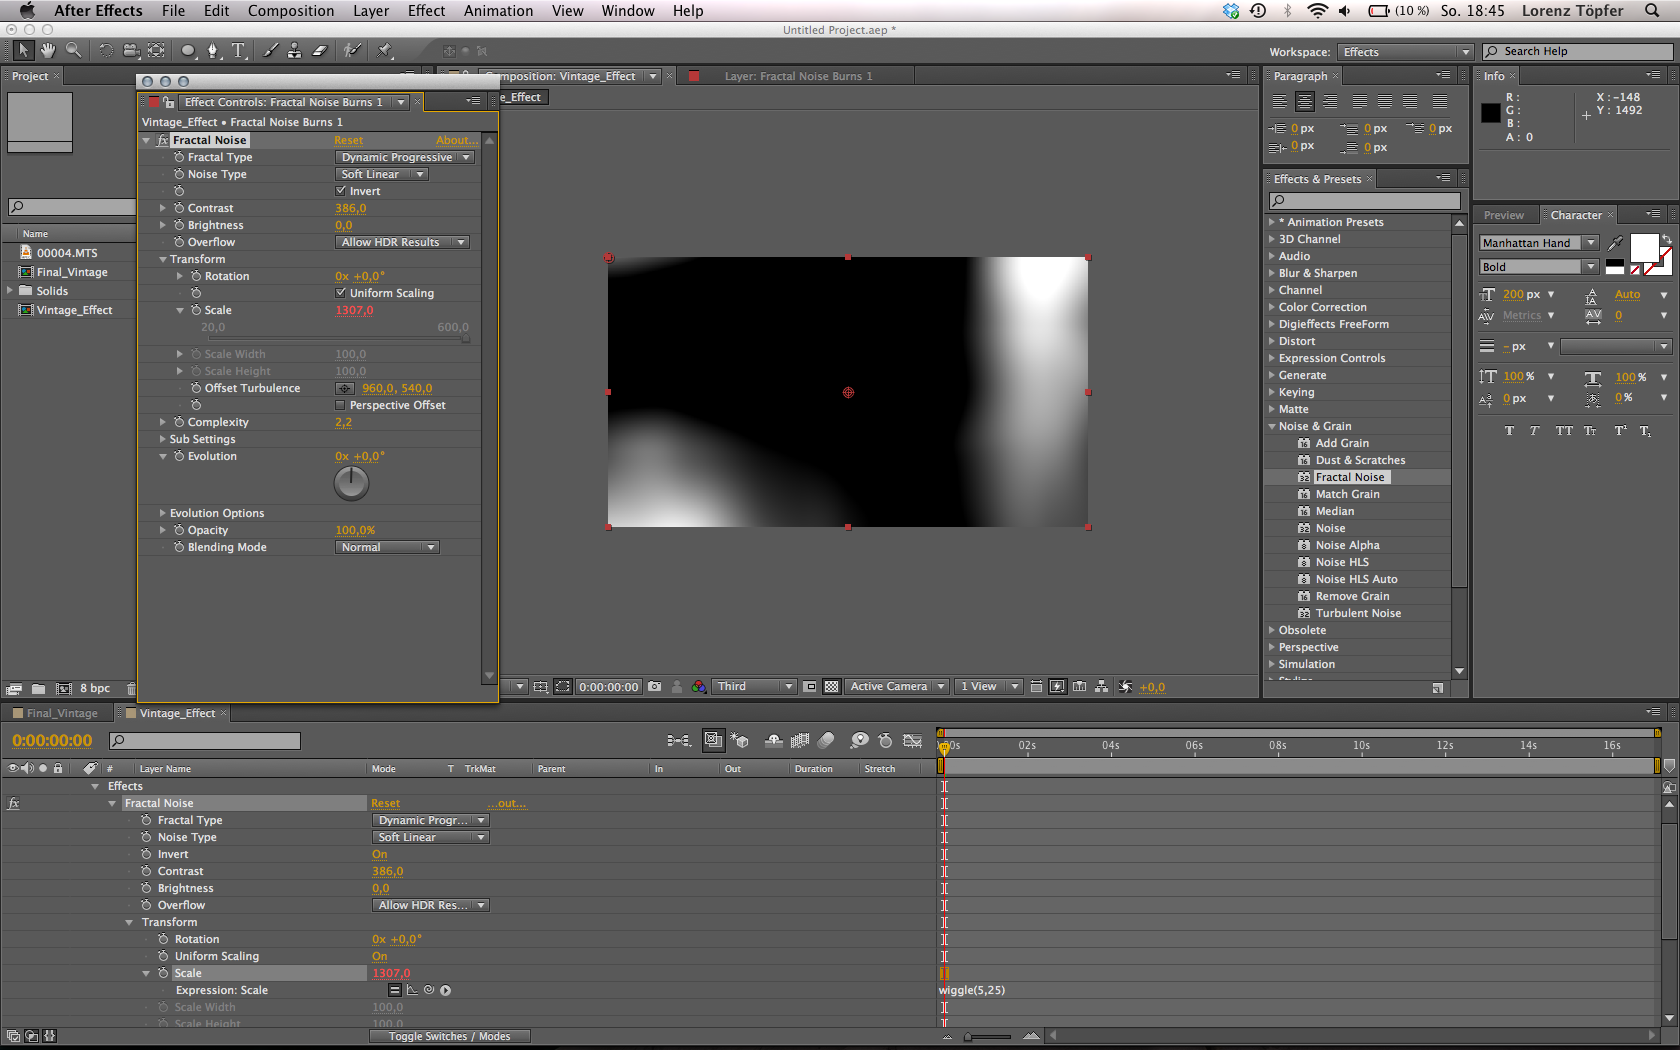 5. Now we want to produce a large fleck from these small flecks. To do so click on the arrow before Transform, within Effect Controls, so that the sub menu opens. Here you will find a point Scale which should be set to a value between 1000 and 1400. The very small and highly patterned layer of flecks will turn into a large fleck as a result of the amplification. Convert the Scale value in an expression so that this will not remain static in one place, but will take on random larger values. To do so left click on the stop watch before Scale whilst pressing the alt key. A column will then open in the layer window where the expression must be entered. We will use a Wiggle, which completely randomly changes between two values. Write wiggle(5,25) in the column and then click on any window in the user interface. The first value in the bracket gives the repetitions per second and the second value determines the amount this attribute changes.
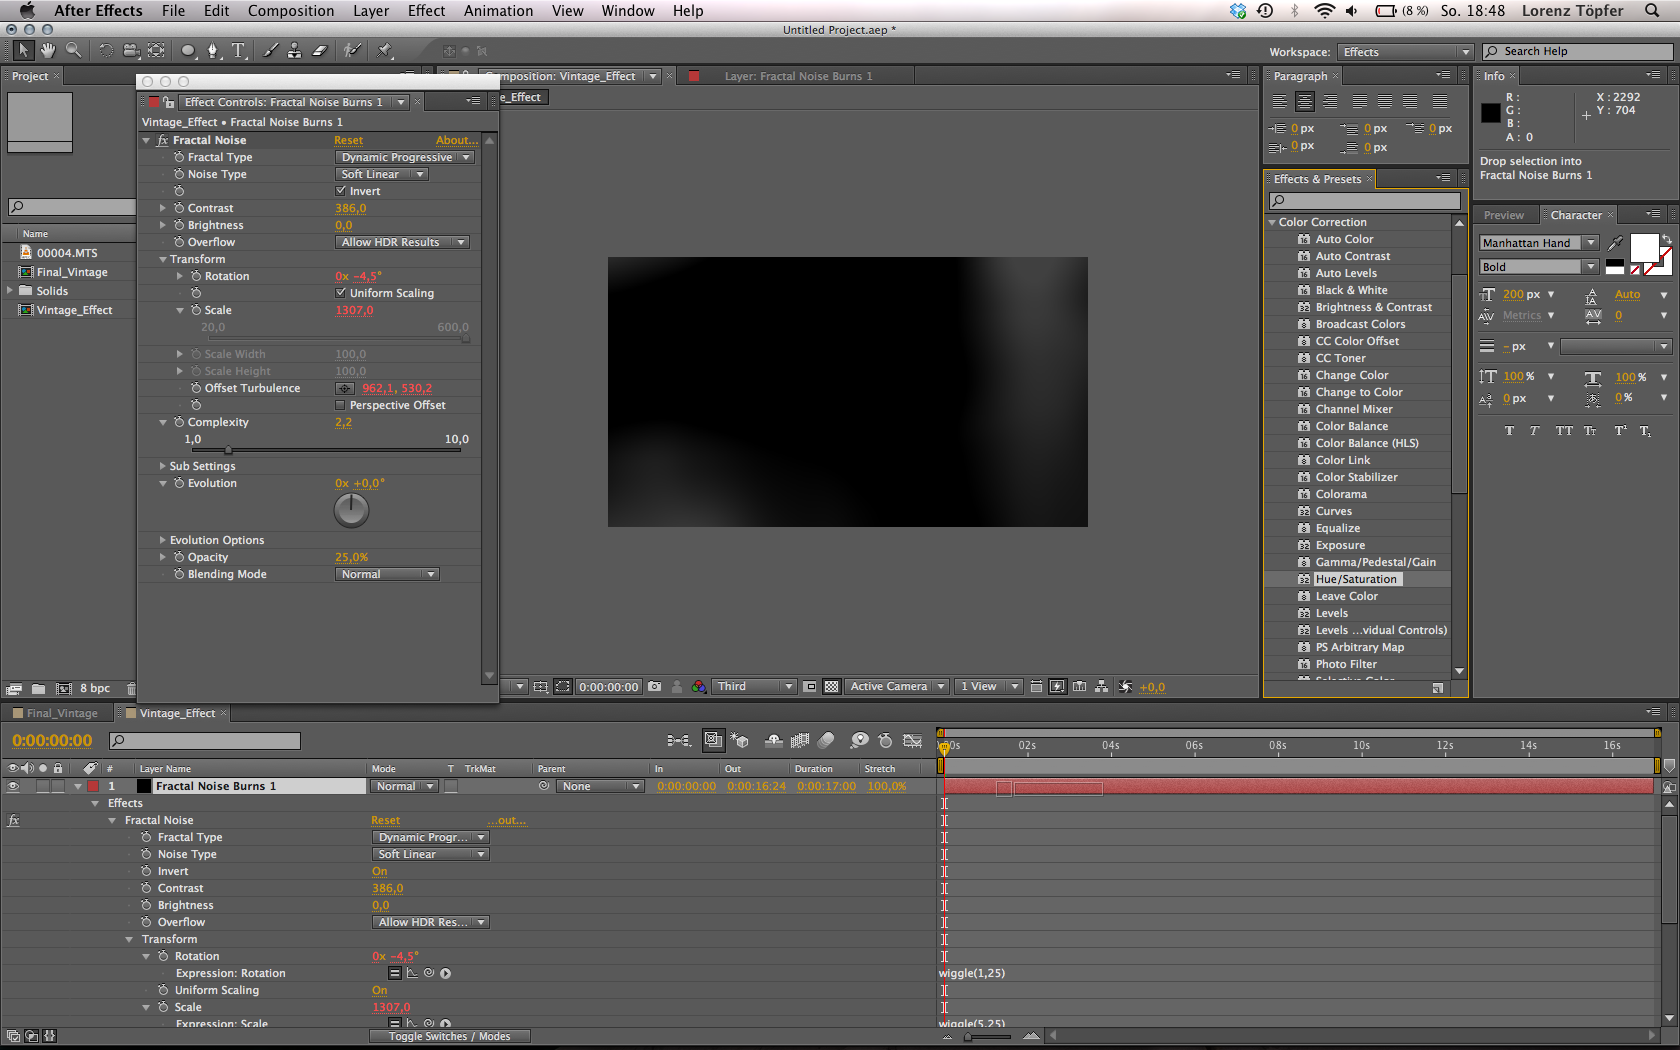 6. Insert a Wiggle in the rotation in the same manner. However use the value wiggle(1,25) so that the rotation takes place in another window of time than the Scale. This will make the animation livelier and more random. Use a Wiggle with a value of wiggle(8,20) as well on the Offset Turbulence. Then insert a Wiggle with a value of wiggle(1,200) into the Evolution too. For the next step alter the Complexity to a value between 2 and 3 thereby reducing the number of flecks. Finally set the Opacity to 25%.
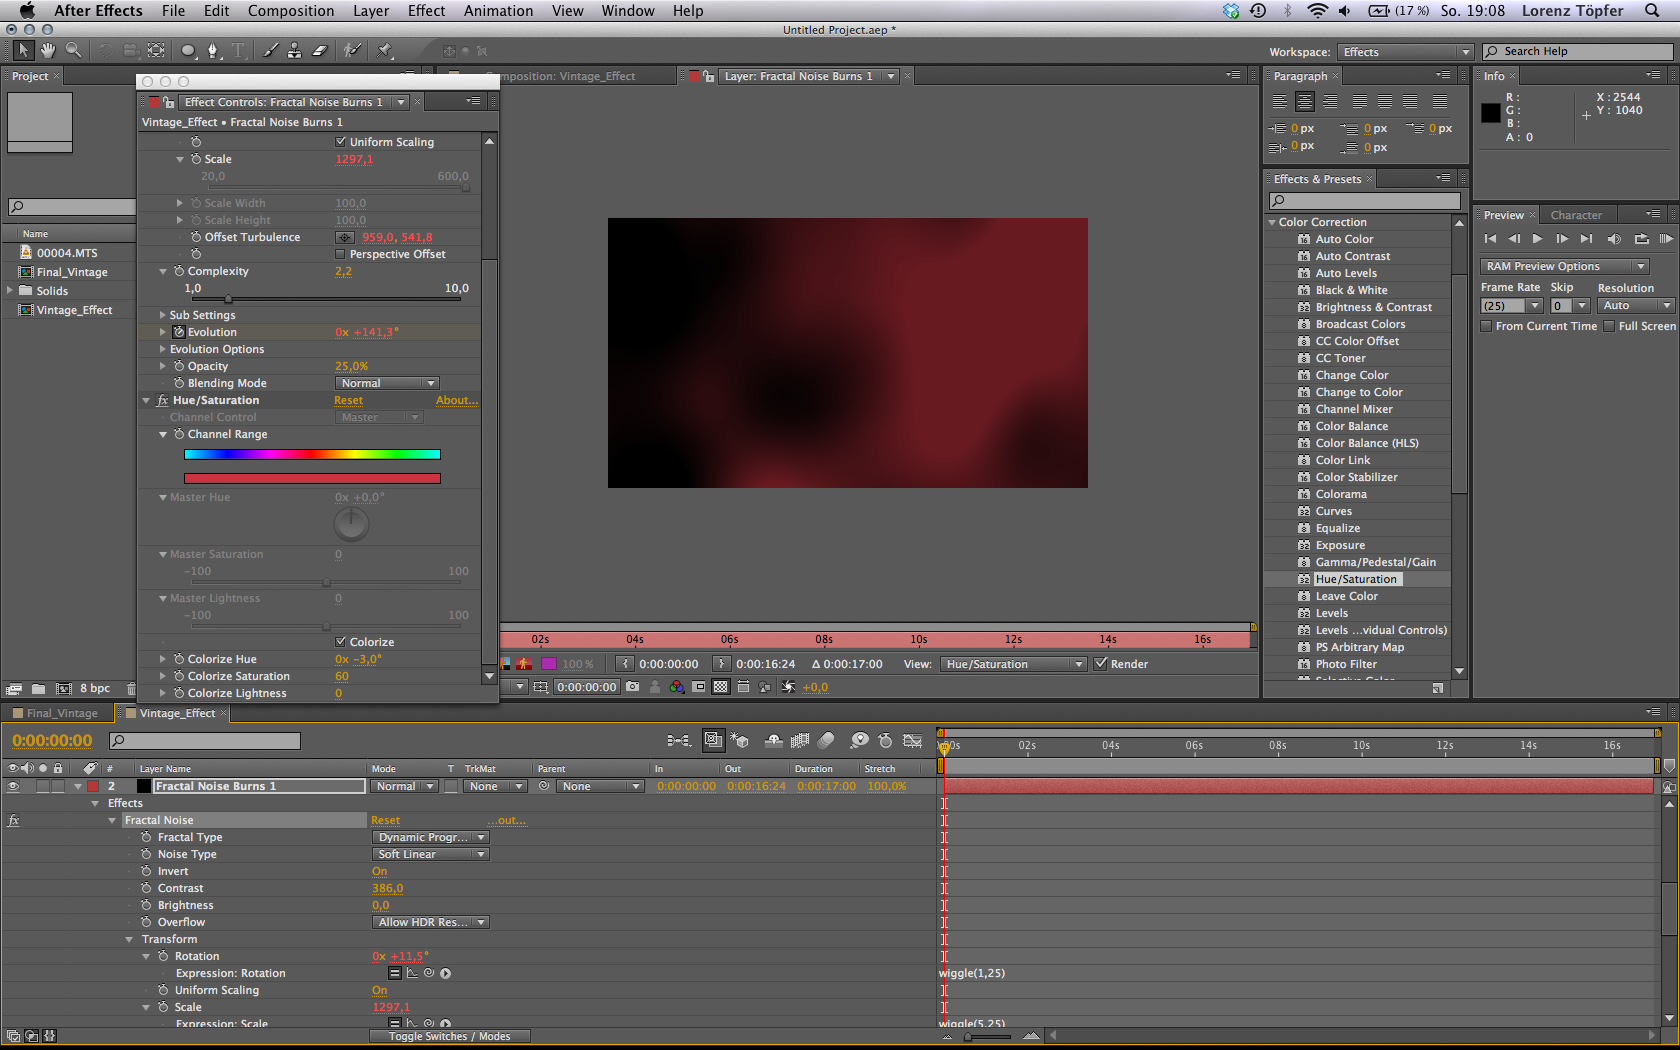 7. Now you will have a grey fleck in the viewer, which takes on randomly generated values which causes it to move. The only thing that is still missing is a little colour. For this lay a Hue/Saturation effect on the Black Solid. This allows you to gain a vintage effect using any colour you like the look of or which best suits the video. In our example we selected a reddish colour for FRACTAL NOISE BURNS 1 which was mixed a little with violet tones. First tick the Colorize box. Then set the Colorize Hue value to 0x -3.0° and the Colorize Saturation to 60. If you follow these steps one by one you should get a nice first impression in the viewer.
 8. After you have edited the first Black Solid, duplicate it by pressing Cmd + D. In the resulting level open the Effect Controls again and alter the values as follows: change the Fractal Type to Basic and then retain the Soft Linear setting for Noise Type. As explained above it is worth trying out other combinations. Play with the contrast, the brightness, the size, the opacity and the complexity until you are satisfied with the result. This time write time*80 as an expression in the Evolution field. To finish alter the colour using the Hue/Saturation effect to orange or yellow and try out different Colorize Saturation values to find a look that best suits your film.
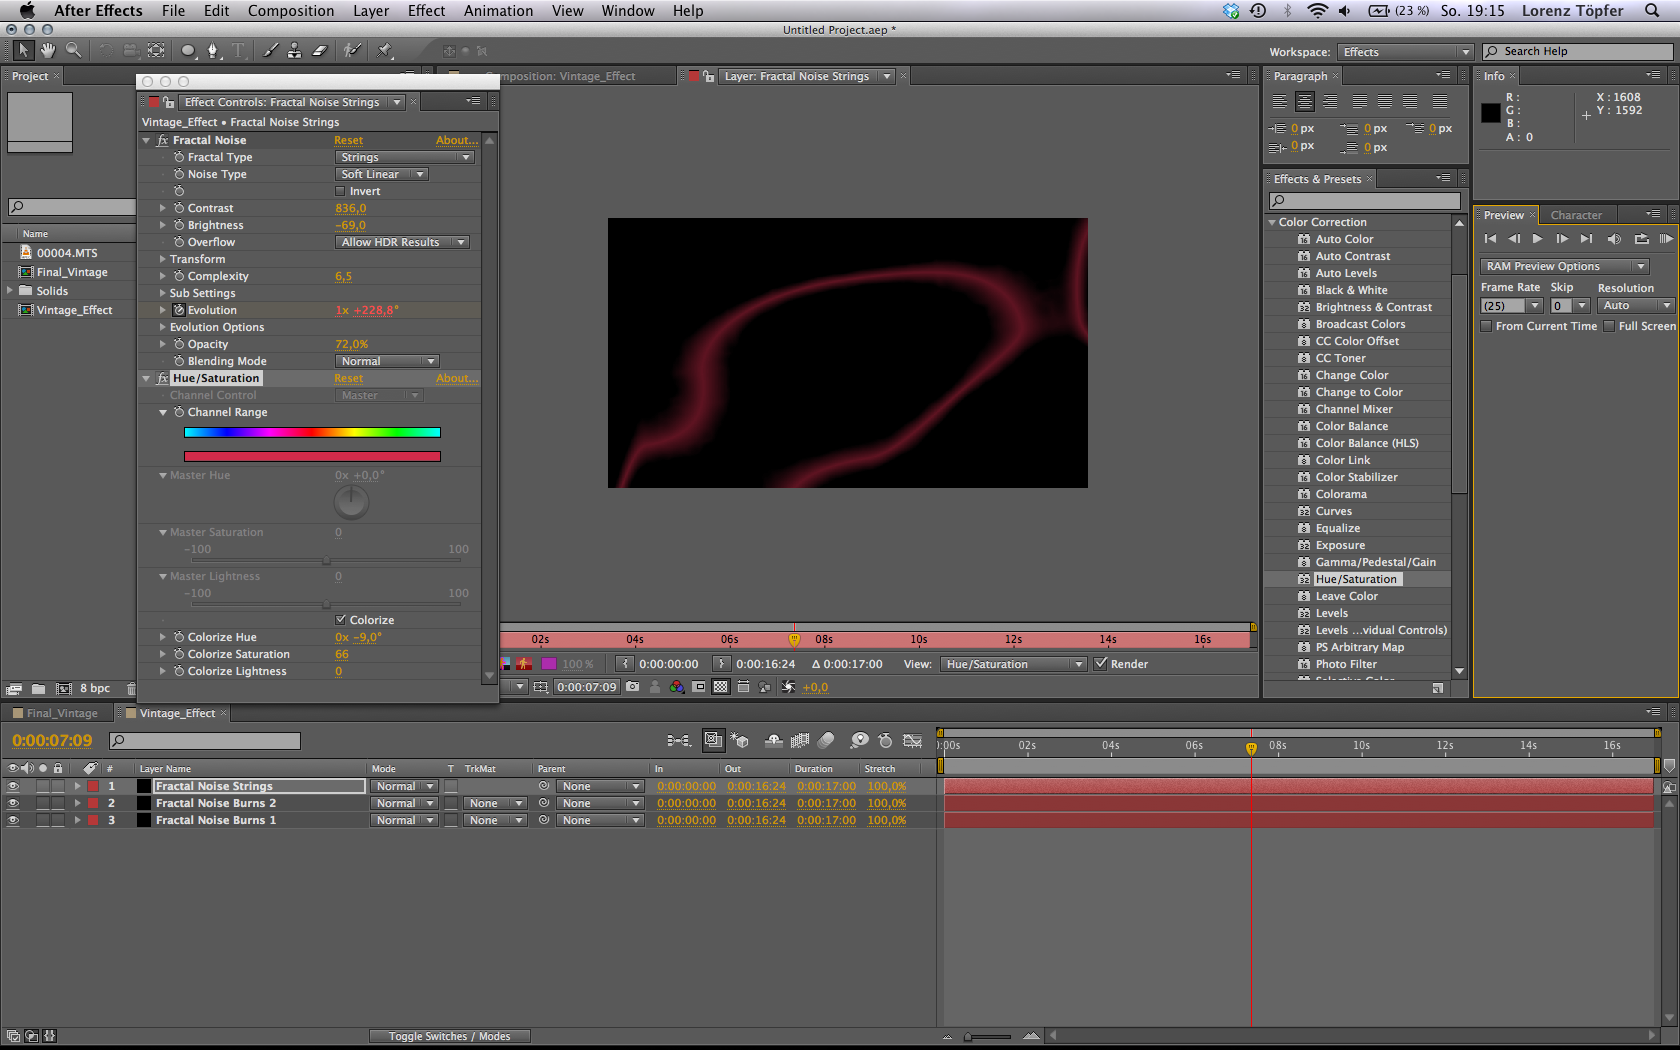 9. If you still want some more variety within the Fractal Noise levels create a third level using duplication. Call this FRACTAL NOISE STRINGS and open the Effect Controls window, like with the other layers. Then set the Fractal Type to Strings. Experiment with the other values and animate some attributes with an expression. Also make sure that the Invert box is deselected. Hue/Saturation is ideal for playing with colours; don’t insert an expression but generate nice colour changes using key frames. In the meantime you can integrate the result into the FINAL_VINTAGE composition where your film material is. The vintage effect can be changed to suit your requirements at any time. Give your creativity free rein!
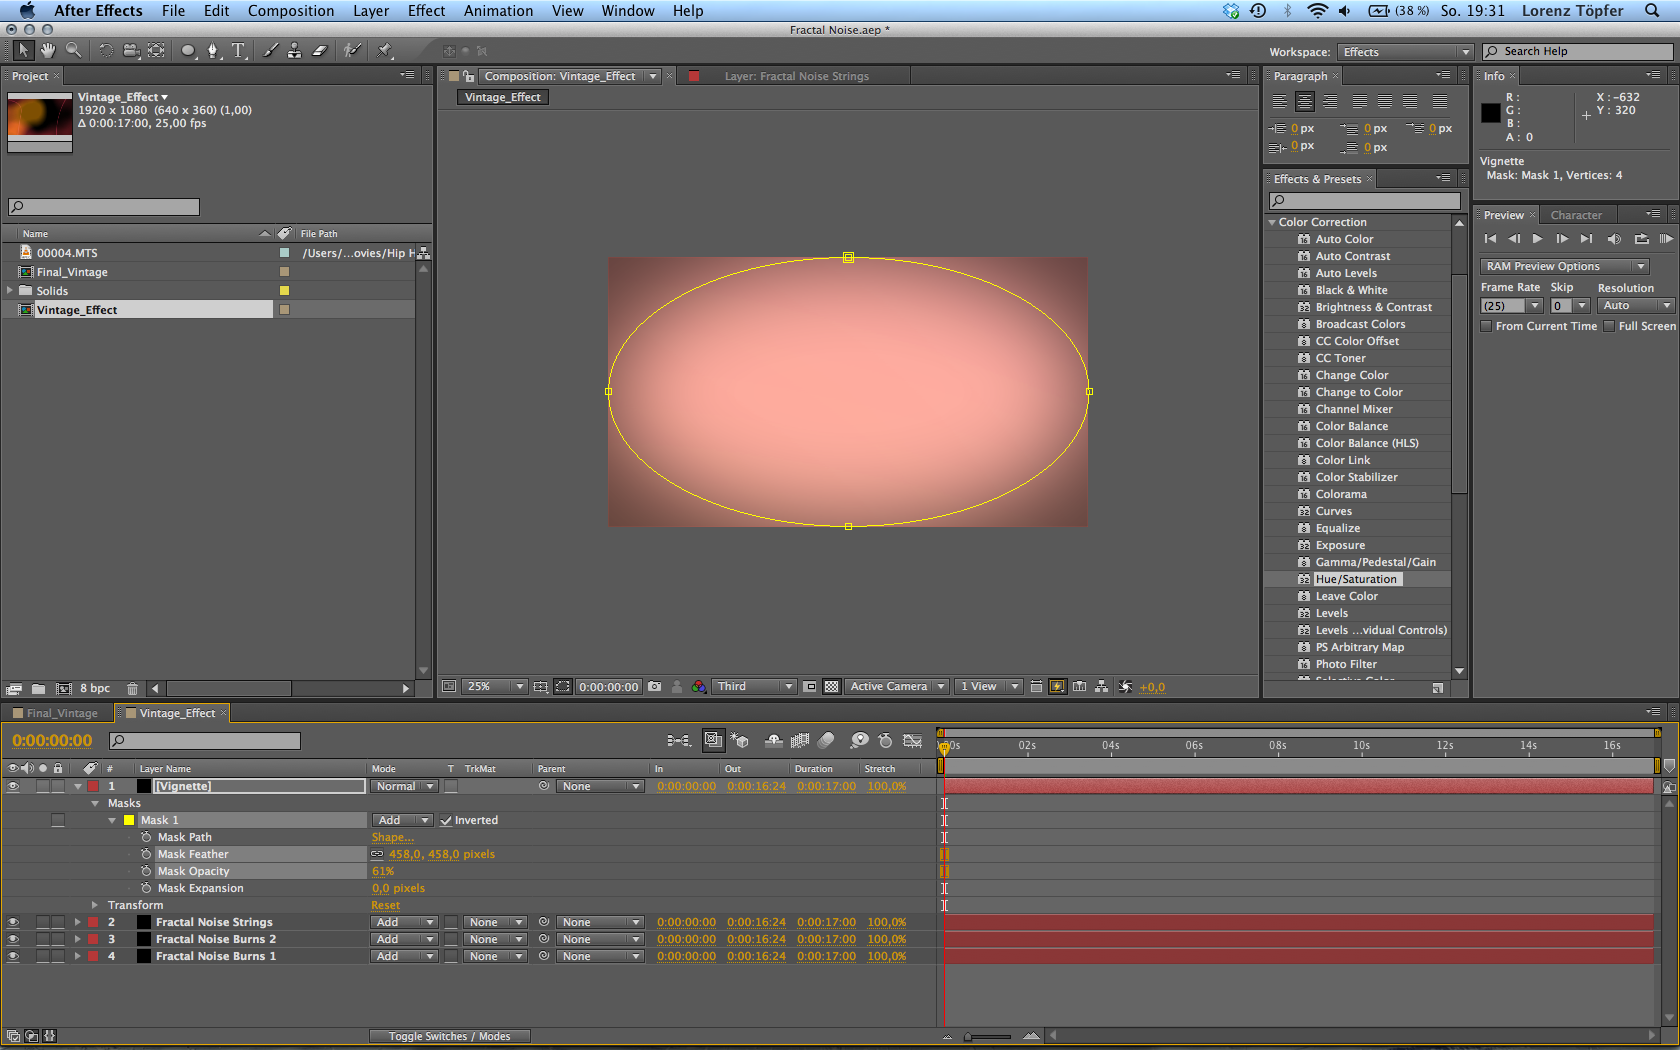 10. You can use a vignette to further enhance a composition. This will give the film a professional look and will draw viewers’ eyes to the middle of the image. Again, create a Black Solid using a right mouse click; name it VIGNETTE. Then mount an oval shape within the image using the Ellipse Tool (Q), adjust this by double clicking and then manipulate the transform points until the oval mask touches all edges. Then select the mask MASK 1 in the layer window and click on the arrow in front of this. Tick the Inverted box and turn the Mask Feather until there is a smooth transition from the middle of the image to the edges. Finally select a small value for the Mask Opacity because the vignette will only be perceived subconsciously and should not sit in the foreground. Otherwise the vignette would serve no purpose and would irritate the viewers. Pay attention to the layers’ Mode at the end. The three Fractal Noise layers should have Add as the mode. The vignette should act as an overlay on top of the other layers.
 These are the 10 recommended steps to efficiently achieving a nice vintage effect.
We recommend that you edit your film in Adobe Premiere Pro so that the two tools can interact properly. Either use the Adobe Dynamic Link or import the created composition in Adobe Premiere Pro.
Adobe Dynamic Link is a very useful tool but needs a lot of RAM and with less powerful computers the rendering time can be very long.
If you open the composition directly in Adobe Premiere Pro and drag it to the timeline there, it uses less RAM and remains more clearly laid out.
An additional advantage of this effect lies in the fact that you won’t need to carry out extensive colour correction. This effect can also be used to save a lot of time during post processing. We however recommend increasing the contrast of clips using Brightness and Contrast in order to achieve an even better end result.
Have fun experimenting!
Adobe Dynamic Link
is a useful connector within Adobe Suite. You can use it within the Adobe Suite to, for example, import various Affect Effects compositions, Photoshop and Illustrator files into a Premiere Pro file. In addition you can also access the individual layers within the files at any time. This saves a lot of time and makes large projects easier to handle.
Instagram
Is a Smartphone app, which can be used to optically improve images. It is often used to imitate the Polaroid look from a digital photo. This look has also spilled over into the video sector. Instagram took a significant upturn as a result of social network integration which continues to this day.
 The author
Lorenz Töpfer works as an Art Director on various low budget music videos. He edits a lot of his videos with After Effects, in order to achieve completely unique effects thereby always surprising viewers with something new. He is currently studying Digital Film Making at SAE Munich. In addition he also makes music himself and is therefore very familiar with the material of music videos. The example in this tutorial is his final project for his Diploma.
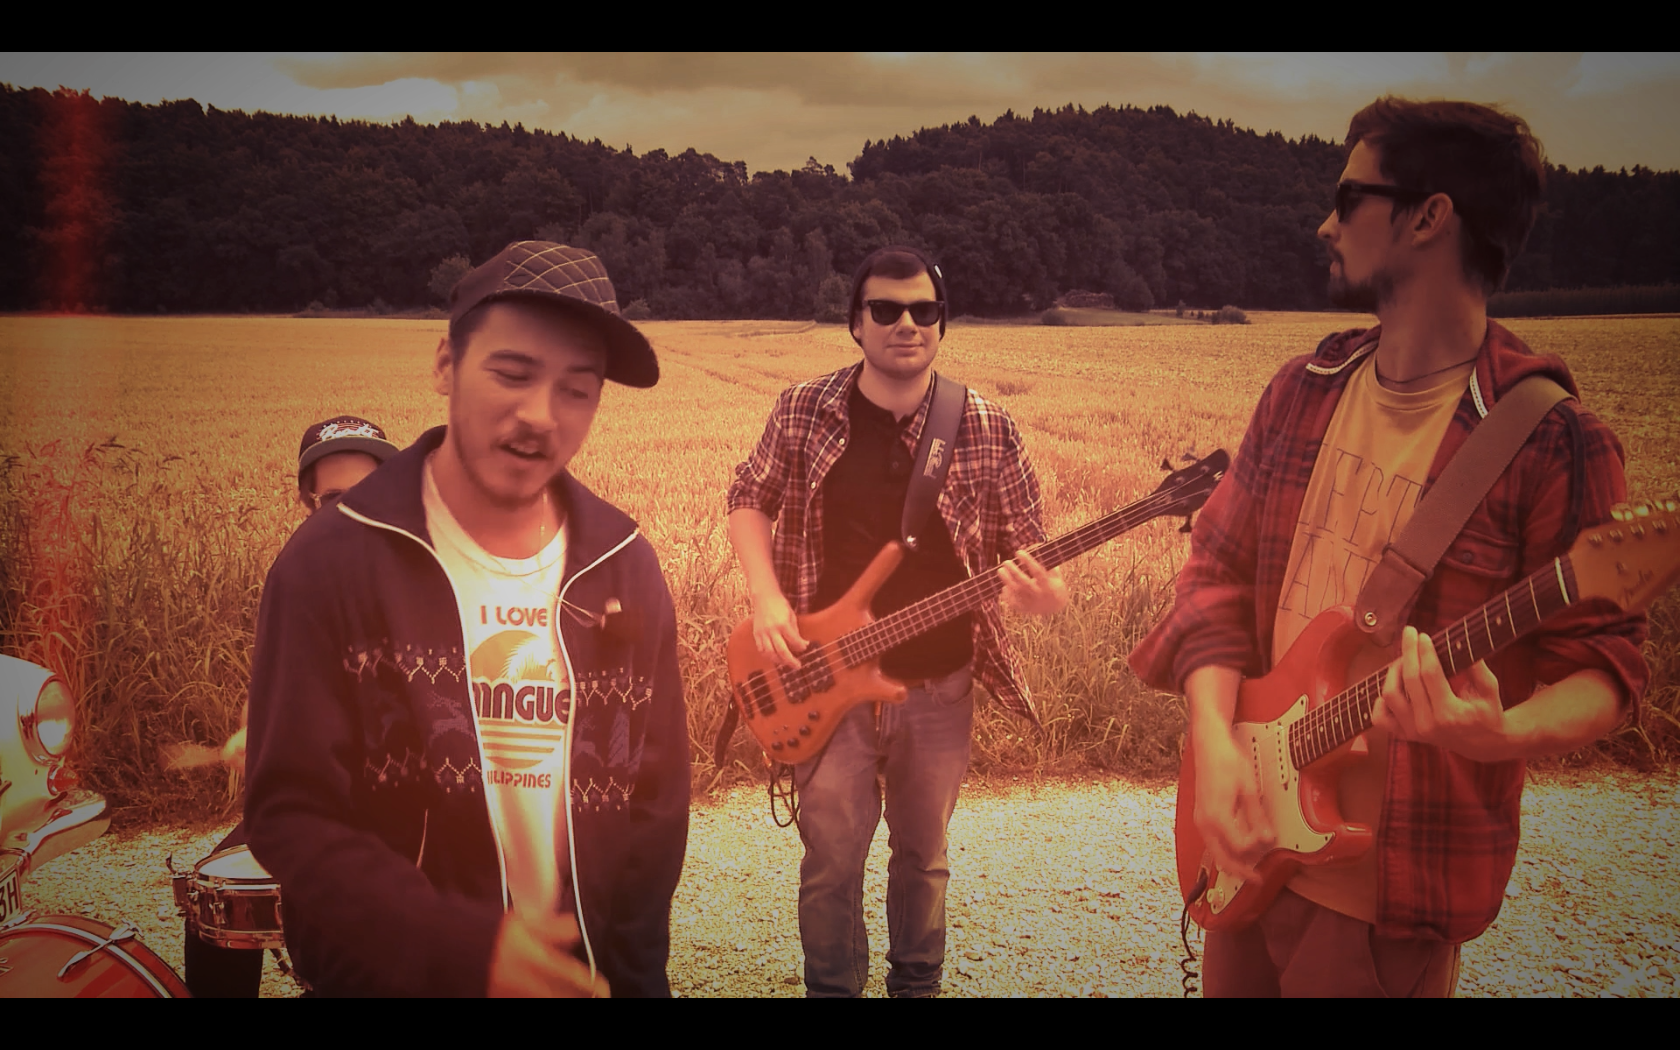
The images are taken from the production phase and the finished music video “Fernweh” (2012) by the band Bubba Hood.

The rights in the images are held by Lorenz Töpfer.
Sources:
Fontaine, Philippe (2012) Adobe After EffectsCS6: Das umfassende Handbuch. [Adobe After Effects CS6: A Comprehensive Handbook] Galileo Press GmbH
www.ehow.com/how_2209934_change-column-settings-indesign.html (accessed on 09.12.12)
http://helpx.adobe.com/de/indesign/topics.html (accessed on 09.12.12)
1 Comment
Tech now with social media is getting really good (2019). TikTok blows me away with the coolness factor and what can be done. Instagram has also improved their graphics algorithms, facebook is even starting it up with stories. I had a notice in my YouTube account that I could do stories there. What? I checked it out. It’s lame at the moment, but probably going to ramp up considerably as YouTube tries to find more angles to work to increase viewers and clickers on ads. Loving this blog. Thanks for your efforts!